March 5

SophosXG Customization

Mount filesyustem RW,

mount -no remount,rw /

Use vi to edit /scripts/system/clientpref/customization_application_startup.sh and add the lines. This should then look like:

#!/bin/sh
iptables -t mangle -D POSTROUTING -d 172.19.0.0/16 -p tcp --tcp-flags SYN,RST SYN -j TCPMSS --set-mss 900
exit 0;

Save the changes and exit vi
Write protect the startup script again:
mount -no remount,ro /

October 24

Laptop (HP, ASUS etc) high pitch noise.

I tried the solution below and it worked on my HP 450 G4 laptop,

Certain lines of Asus laptops emit an intermittent high-pitched noise resembling an electronic signal.  


The lines affected include the following:
K5JR
K52JR
k42jr
K51AE
K51AC
K25F
eee PC 1201T
UL80J


This noise has been variously described as a whirling noise, a chirping noise, a whiney noise, and a screeching noise akin to fingernails on a chalkboard.
This noise can be very irritating and have been the subject of numerous complaints to the company.  The company has not been very responsive to these complaints.
The good news is that there is a fix for this problem.  The process takes less than five minutes.  I’m no expert, but the following is what worked for me.  Follow these directions at your own risk!  If you have a better fix, please let them in the comments for everyone’s benefit.

Step 1.

Click the Windows Start icon, and in the “Search Programs and Files” field type regedit

Step 2.

Navigate to the following folder:

HKEY_LOCAL_MACHINE \SYSTEM \CurrentControlSet \Control \Power \PowerSettings \54533251-82be-4824-96c1-47b60b740d00 \5d76a2ca-e8c0-402f-a133-2158492d58ad

Step 3.

Click on ATTRIBUTES

Step 4.

On the top of the dialog box it should say DWORD


Step 5.

Change the 1 to a 0

Step 6.

Click on the Windows Start icon.

Go to Control Panel –>Hardware and Sound –>Change Plan Settings (for each plan that you use) –>POWER OPTIONS –>
Advance Power Settings –>Processor Power Management –>Processor Idle Disable

Set both of them to Disable Idle

Source

March 20

VPD is corrupted or Invalid (IBM & Cisco)

Since Lenovo FTP is having issues every now and then, I add here the script(s) to repair the VPD.

Link

Original IBM/Cisco solution


This script must be executed under linux enviroment, for Windows 10 you can also use WSL (Debian)


Note also that the user (default  USERID) has to have S(upervisor) privileges and not O(Operator) under the MM config.


  • ensure you can access the AMM in question via ssh by opening an ssh connection,  ssh [email protected] (where AMMUSER is a user id on the AMM, and x.x.x.x is the ip of the AMM)
  • run the script,  ./SCRIPTNAME (for ex – ./expect-fix-vpd-2014-08-22-release-servo.exp)
  • Follow prompts
  • Open a terminal to the Bladecenter Chassis AMM with the affected switch (telnet or ssh) run info -reload all -T switch[x] where x is the slot number of the switch with the corrupted VPD
  • This should cause the error to go away, but in the event that it does not, you may need to reboot the AMM. If there are 2 Management Modules, pull the secondary, reboot the primary, and then check on the status of the switch again once the AMM is finished refreshing all its information (usually about 2-3 mins after it is available via http or pingable).
  • Upload logfile if the issue is not resolved

If the script seems to exit abnormally, the check to see if VPD values were corrected. If not, re-run script
before opening a support request.


April 6

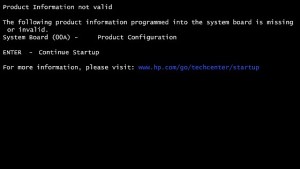
HP DV7 Series BIOS and PCID

If you come across a corrupted BIOS or a bad flash of an HP DV4/5/6/7, you may see the error System Board (00A)

Usually you can fix it with the HP DMI Tools from HP (HPBQ138.exe) , but in some cases the PCID is not 25 chars but 17. This come with the error below…

The input PCID is invalid


pcid


The tools here are the old versions which allows to edit the DMI to 17 chars

HP DMI Tools

P.S. You will need a MS/Free/Mini-DOS bootable USB disk, and then copy the files

to the flash drive.


HP reference documentation

HP Consumer Notebook EEPROM utility


February 18

OpenVPN Site-to-Site

This is a small how-to for OpenWRTs running OpenVPN and connecting them by creating a site-to-site VPN tunnel.


-We assign 2 IPs, one for each tun0 interface on each router

-This guide assumes that you have already install openvpn packages on both devices

-In this guide A router has 192.168.10.x network and 192.168.251.1 IP in tun0 interface, and router B has 192.168.22.x network with 192.168.251.2 IP in tun0 interface.

-You will need  the file /etc/openvpn/static.key or generate a new one in one router and copy it to the other.

-Port 1195-1194 can be changed

-You can have multiple blocks of configuration in OpenVPN, one for Road Warriors  (see here) and the one documented here.

-Follow the guide here for installing Open VPN and configuring the interfaces tun0/tun1 etc


Router A


config 'openvpn' 'site-to-site'
        option 'enable' '1'
        option 'port' '1195'
        option 'proto' 'udp'
        option 'dev' 'tun'
        option 'secret' '/etc/openvpn/static.key'
        option 'ifconfig' '192.168.251.1 192.168.251.2' #this device tun0 / remote device tun0
        option 'keepalive' '10 120'
        option 'comp_lzo' '1'
        option 'verb' '10'
        option 'float' '1'
        option 'local' '192.168.10.1 1195'
        option 'remote' 'remote.host.name 1194'

Add to  /etc/firewall.user


iptables -t nat -A prerouting_wan -p udp --dport 1195 -j ACCEPT
iptables -A input_wan -p udp --dport 1195 -j ACCEPT

iptables -I INPUT -i tun+ -j ACCEPT 
iptables -I FORWARD -i tun+ -j ACCEPT 
iptables -I OUTPUT -o tun+ -j ACCEPT 
iptables -I FORWARD -o tun+ -j ACCEPT


Add  a static route between the 2 LANs


route add -net  netmask 255.255.255.0 gw 192.168.251.2

Router B


config 'openvpn' 'Site-to-site2'
	option 'enabled' '1'
	option 'dev' 'tun'
	option 'ifconfig' '192.168.251.2 192.168.251.1'#this device tun0 / remote device tun0
	option 'secret' '/etc/openvpn/remote.key'
	option 'keepalive' '10 120'
        option 'comp_lzo' '1'
        option 'persist_key' '1'
        option 'persist_tun' '1'
        option 'verb' '3'

Add to /etc/firewall.user


iptables -t nat -A prerouting_wan -p udp --dport 1194 -j ACCEPT
iptables -A input_wan -p udp --dport 1194 -j ACCEPT

iptables -I INPUT -i tun+ -j ACCEPT 
iptables -I FORWARD -i tun+ -j ACCEPT 
iptables -I OUTPUT -o tun+ -j ACCEPT 
iptables -I FORWARD -o tun+ -j ACCEPT


Add a static route between the 2 LANs


route add -net   netmask 255.255.255.0 gw 192.168.251.1